Option 2: Quickmail Block
Add the Quickmail Block to your course.
If it's already in your Block Drawer, you can skip to Sending a Message.
1. Turn Editing Mode on and toggle open the Block Drawer.
2. Click Add a Block and choose Quickmail.
Sending a Message
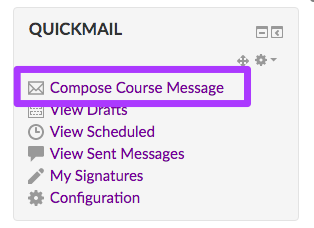
Click "Compose New Message" and see below for continued instructions.
The Quickmail Interface
Choose who you'd like to send the message to. You can select "All in Course", add specific individuals, or choose a specific role(s). If you choose specific roles, be aware that you may have students in the "Student Other" and "Student 5C" roles as well as "Student AC"- so be sure to include them!
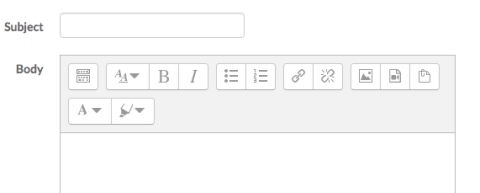
Fill out the subject and message body...
The “Supported user data fields” is an optional but interesting feature that lets you make your messages more personalized, similar to a Mail Merge. For example, if you add the text “Hi [:firstname:]” to the message body, each student will get an email with their own first name in the message body (ie “Hi Joe”).
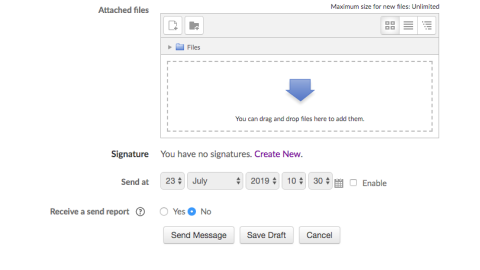
At the bottom you can add attachments (see below), set an email signature, or choose to send the message at a later time. If you want to get a copy of the email, be sure to select “Yes” for “Receive a send report”.
Click "Send Message"! Make sure you come back to the main Moodle course page- if you still see the Quickmail screen and your message, it has not sent. Check for a missing field such as the subject.
A Note About Attachments
- In Quickmail, the email recipient will receive links to the attached files instead of traditional attachments. All the recipient has to do is click the link to download the attachment.
- An email with multiple attachments will contain a link to a ZIP file containing all the attachments. Simply click the link to download the zip file, unzip it, and you will have a folder on your computer with all the files.