Choosing your Space and Setting up to Record Using Zoom

Login: https://amherstcollege.zoom.us/

Choose a quiet location

  • Choose a space away from distractions or a room where you can close a door if needed.

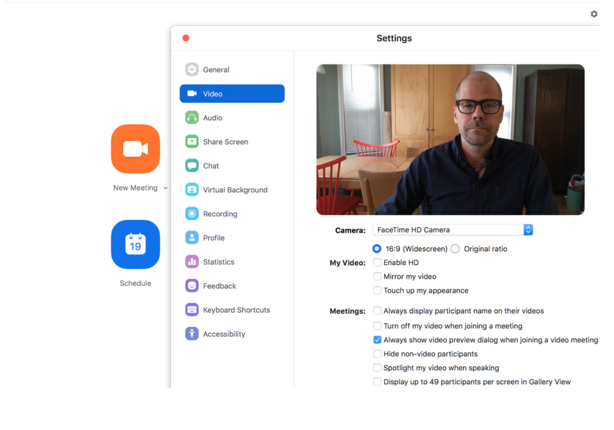
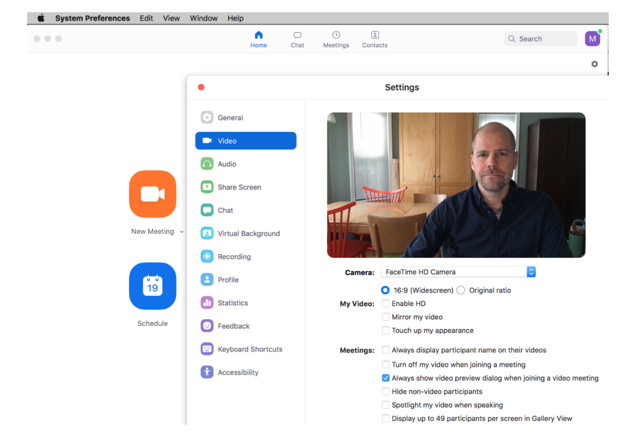
Choose a space where you can control the light

  • During daylight hours, avoid uncovered windows in the background or use the windows to light your face.
  • Brighter light behind you will close down the iris of your lens and can leave your face underexposed.

Image
Illustration showing underexposed lighting


Image
Illustration show correct lighting exposure


For Best Results

  • Position your computer on a desk or table that has enough space for two desk lamps. Put one on either side of your machine. Matching lightbulbs with matching or similar lampshades will work best.

  • Raise your computer or webcam up so the lens of the camera is at eye level. A stack of books or an empty box can help here.
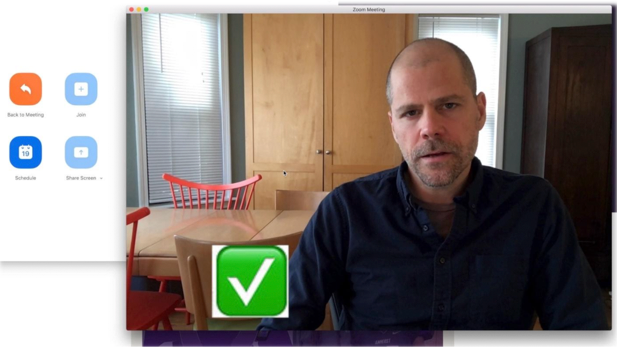
  • Look into the lens when recording to help connect with your audience.
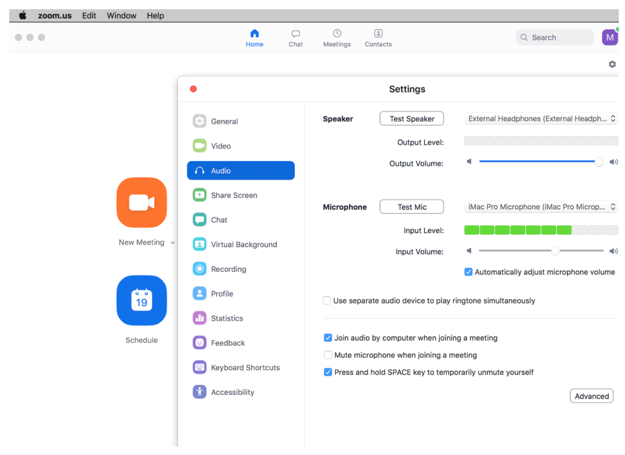
  • Once you have your computer’s location set, plan to sit at arm’s length or no more than three feet from your webcam. Your microphone can now record your voice adequately. (Make sure to test your sound. See below.)

  • If possible, avoid wearing glasses, because of the resulting reflection. If you can’t avoid it, dim your display as low as you can to avoid it any reflection in your glasses.

With Reflection:

Image
Illustration of glare on glasses

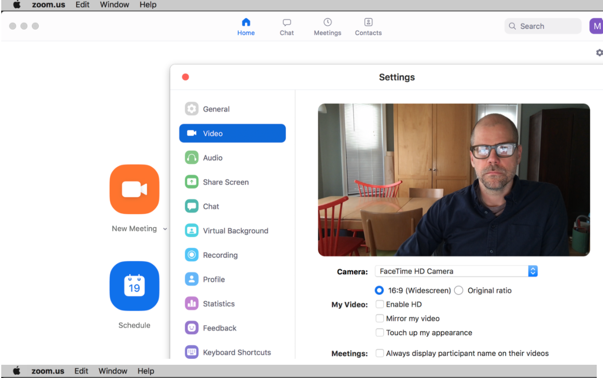
Minimize Reflection:

Image
Illustration showing acceptable amount of glare on glasses

Adjusting your Settings and Getting Ready to Record

  • Open Zoom and choose Preferences from the Zoom menu.

  • Navigate to the Recording tab and make sure “Optimize for 3rd party video editor” is checked. Editing your video after you record it will now be much easier.

Image
Zoom settings

Saving Your Recording

  • At the top, you’ll see “Store my recording at:” and the location of the folder. This shows you where your recordings will be saved. If you want to, you can change this to another location.

Check Your Settings

  • Above the Recording tab are the Audio and Video tabs. Take a look at your Video tab to make sure your camera is selected, make any lighting adjustments and set yourself in the frame, slightly off-center, or follow the rule of thirds.

Image
Illustration of the rule of thirds when framing a video

Audio Settings

  • Select and test your microphone level in the Audio tab. Make sure your voice is activating the green area of the input level volume indicator.

Image
Screenshot of audio settings in Zoom


A Few Last Tips

  • Have the websites and/or applications that you plan to screenshare open on your desktop to help with the transition away from the camera.
  • For longer presentations, try to work in sections.
  • Have some notes prepared but remember: look into the lens (towards the microphone) as much as possible.
  • Remember that any stumbles along the way can be edited out. 

Questions? Assistance with editing?

Contact Marcus DeMaio [mddemaio@amherst.edu] or Roberta Diehl [rdiehl@amherst.edu].