During COVID-19, Zoom meetings are de rigueur, and scheduling them with the College’s standard calendar application, Google Calendar, is a relatively quick process. This includes setting up Appointment slots, which are available to anyone until someone clicks on them to reserve them:
- Start the application zoom.us.app, and menu zoom.us > Schedule Meeting… , or
- Within Moodle’s Zoom tool, click the button Schedule a New Meeting.
- Within Zoom:
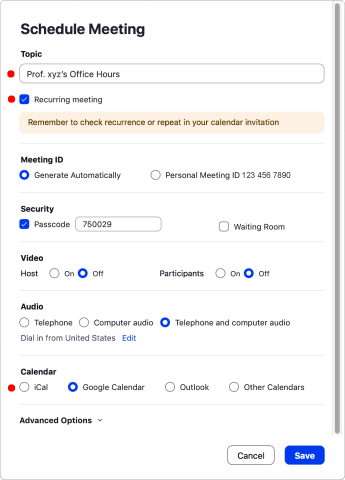
- Type in the Topic, something like Prof. xyz’s Office Hours.
- Check on the box Recurring meeting.
- If you want to ensure private meetings, check on the box Waiting Room.
- If you are using:
- the application zoom.us.app:
- In the section Calendar, click on the button Google Calendar.
- Click the button Save.
- Zoom will ask to add this meeting to your calendar; instead close this window and return to the application zoom.us.app.
- In the list of Zoom meetings, on the left-hand side, locate the one you just created and if it’s not highlighted click on it.
- Click the button Copy Invitation.
- Moodle’s Zoom tool:
- Click the button Save.
- In the list of Zoom meetings, locate the one you just created and click on its Topic.
- In the meeting settings, in the section Invite Attendees, click the button Copy the invitation.
- In the dialog Copy Meeting Invitation, click the button Copy Meeting Invitation.
- Click the button Cancel.
- the application zoom.us.app:

- If necessary, login with your Amherst username and password.
- To schedule the block of appointment times, click-and-drag over the entire time range.
- In the dialog that appears, click on the tab Appointment slots.
- Click on the button More options (the other options can be adjusted in the next step).
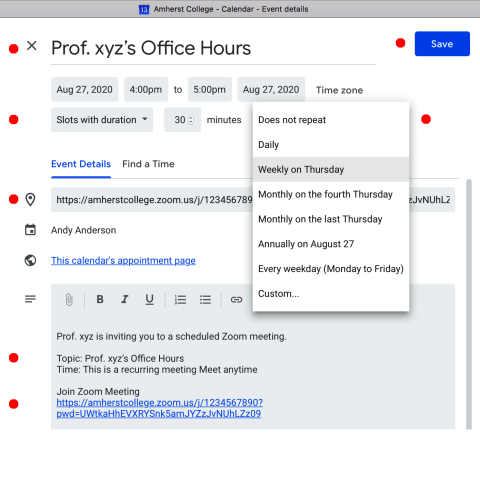
- Copy just the Topic, and paste that into the field Add title.
- Copy the Zoom meeting Web address, and paste that into the field Add location.
- Choose the duration of each time slot for which students can sign up.
- If the appointment slots will occur on a regular basis:
- Click on the menu initially containing Does not repeat, and select a schedule, e.g. Weekly on ….
- To set an end date, select this menu again and choose Custom….
- Click the button Save.
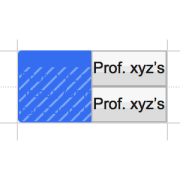
- If a student needs to cancel an appointment slot, they can select it on their calendar and delete it, whereupon it becomes available again to other students. (You can do the same on your own calendar.)