- Step 1: Creating a New Kaltura Playlist
- Step 2: Adding Kaltura Playlist to Moodle Site
- Edit an Existing Playlist
Creating a New Kaltura Playlist
Note: Playlists can only be created with videos that have already been uploaded to “My Media” (there is no step for uploading new videos when creating a playlist).
First, you'll need to add the Media Gallery block to your Moodle course. Then, click the link to go to the Media Gallery.
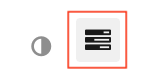
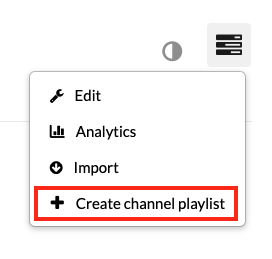
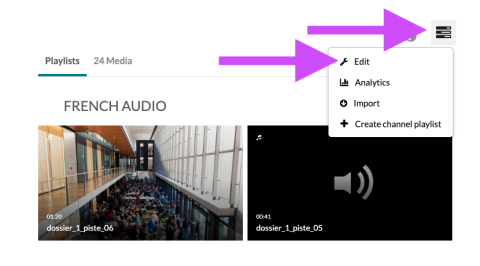
On the page that opens, click the following "Channel Actions" icon on the right of the page:
Select “Create channel playlist” in the menu:
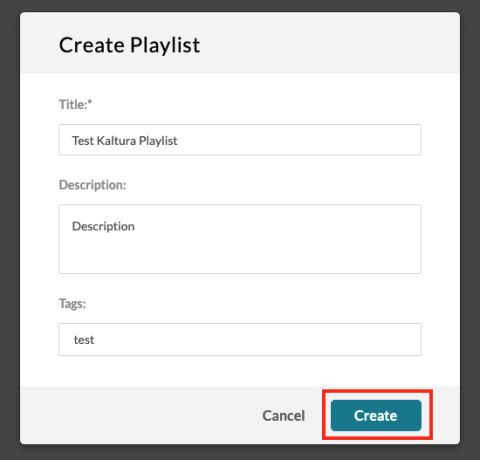
Enter in the title (can add description and tags, if desired) and click the "Create" button:
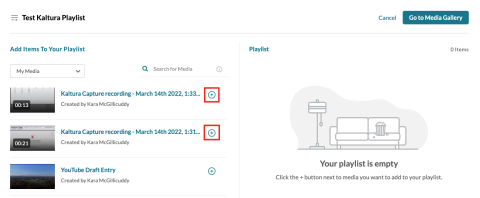
Select videos from the media gallery list by clicking the icon of a green plus sign inside a white circle, next to each desired video:
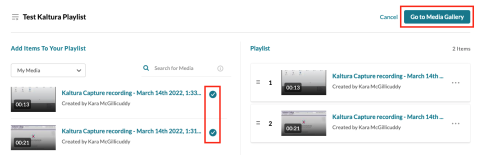
Once desired videos are selected (indicated by the circle becoming green with a white checkmark), click the “Go to Media Gallery” button at the top right:
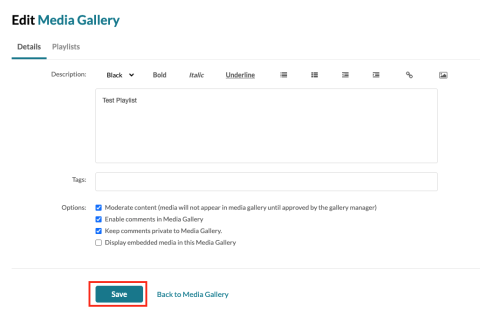
If desired, enter a description and/or tags, and select desired options, then click “Save” button at bottom:
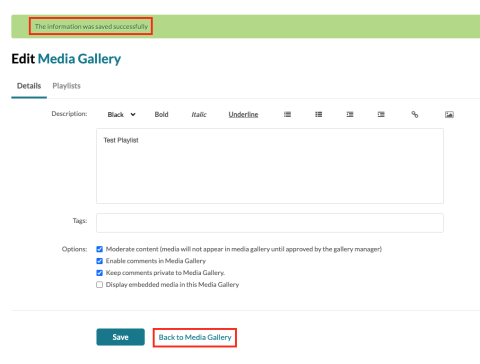
A pop up in green will appear at the top of the page which says “The information was saved successfully” - once you see this, click on “Back to Media Gallery” at the bottom:
You will see the new playlist in your Media Gallery:

Adding Kaltura Playlist to Moodle Site
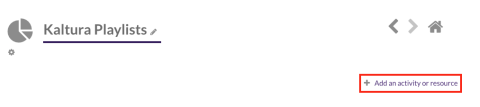
In Moodle, go to the place you want to enter the playlist and click on “+ Add an activity or resource”:
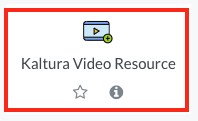
From the options, click on “Kaltura Video Resource”:
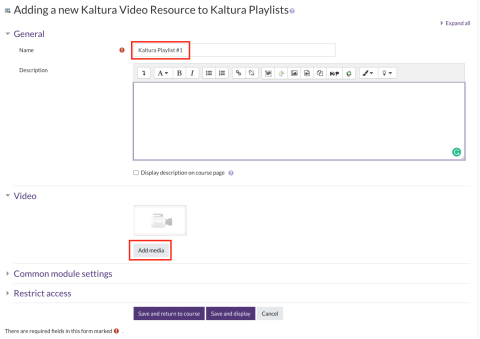
Enter the text you want as the link to the playlist for "Name" (required) and description (optional), then click on the grey “Add media” button lower down the page, in the Video section:
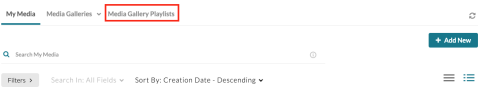
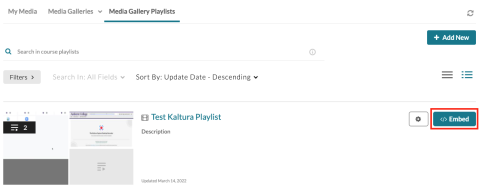
At top of the page that opens, click on the “Media Gallery Playlists” tab to switch to it:
Click on the green “</> Embed” button to the right of the desired playlist:
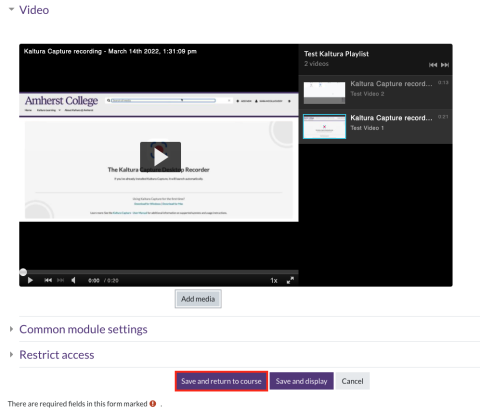
You will return to the activity page for Kaltura Video Resource, and see a preview of the playlist - click on the purple “Save and return to course” button at the bottom:
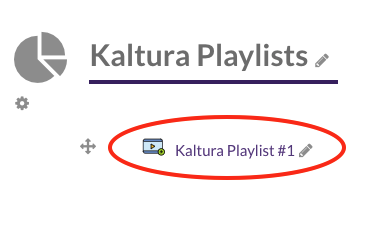
The new playlist will appear on the Moodle site as a link with the text that you entered as the "Name" above:
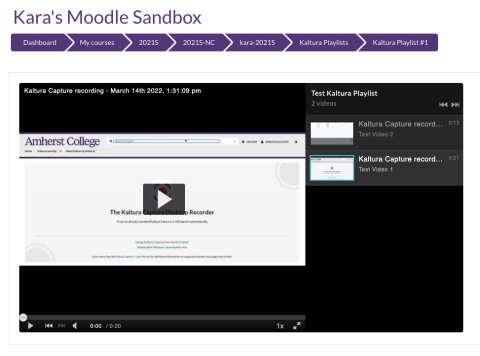
When the link is clicked, a page will open to display the playlist in a media player:
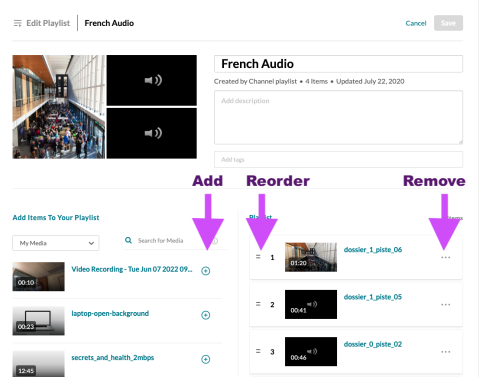
Edit An Existing Playlist
Go to the course Media Gallery (as above).
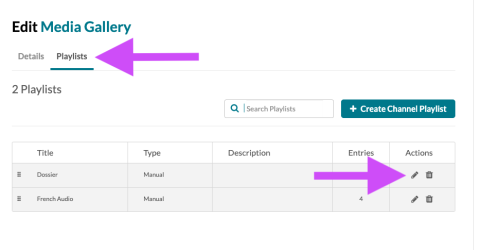
Click the "Channel Actions" icon on the right of the page and select Edit.
Click the Playlists tab, and click the Edit pencil icon next to the playlist.
You can rename the playlist, add videos from your Media Library or the course Media Gallery, reorder videos, or remove them from the playlist.