Creating a shared Google folder or file for your class is a great way to facilitate collaborative learning, share large files, or simply streamline assignments and projects.
Set-Up Steps
-
Create a shared Google folder or Shared Drive for the class
-
Create the specific Google file (Slides, Sheets, etc) the students will work in (if needed)
-
Add links to the Google shared drive or file into Moodle
1. Create a Shared Google Drive
- Instructions and options for creating a shared drive are here.
- You'll need to share it with the students in your class. You can copy the email addresses of your students from Workday or Moodle.
- This is a one-time set up per course. Once you have created this shared space, any Google files saved inside it will be accessible to everyone in the class.
- Note that options are available to prevent students from sharing the folder or files with additional people. This is recommended for enhanced security.
2. Create a Google File (if needed)
Which Google App to Use
- Docs is the equivalent of Word, and works well for collaborative writing and editing, or journalling projects.
- Slides is the equivalent of Powerpoint, and works well for letting each student add slides to the same presentation. Also useful for sharing media, images, short essays, etc.
- Sheets is the equivelent of Excel, and works well for collectively building a shared database, or for scheduling and logistics.
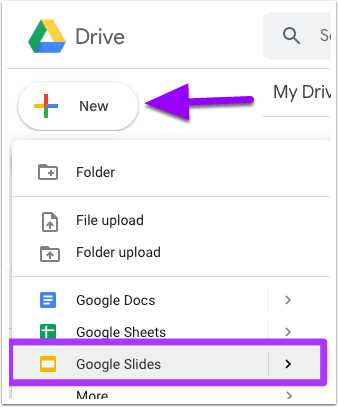
If you want all the students to work in the same file, such as a Google Sheet or Slides, you will want to create it for them. In Google Drive, open your new shared drive or folder. Then, click "New" and select the type of file you wish to create (eg Slides).
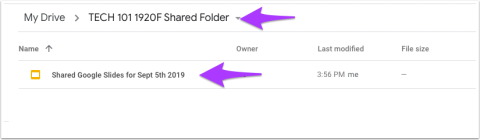
This should create your file AND save it inside your shared folder. You can also move the file after the fact if needed, just make sure it is inside the shared folder!
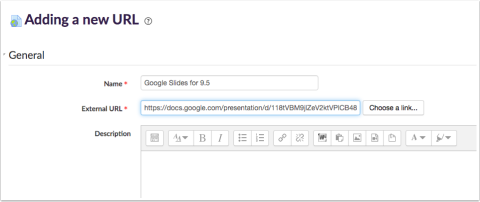
3. Add Links to Moodle
Adding links to Moodle to the shared Google items will make them easier for the students to find.
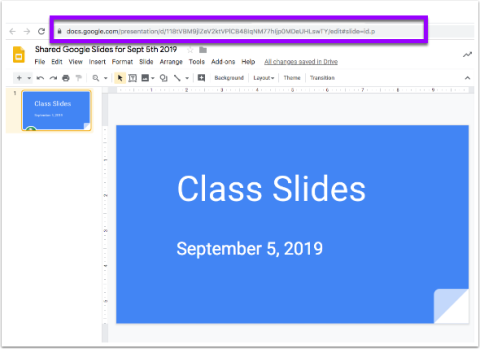
Whether it's a shared drive or a file, simply copy the URL that appears when you have it open on your screen.
In Moodle, Turn Editing On and in the section where you want the link to live, click Add an Activity > URL.
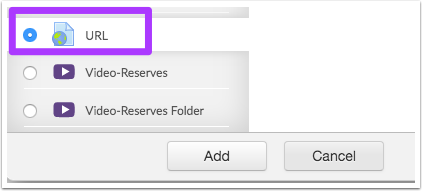
Give the URL a name, and paste in the URL for the google slideshow.
When students click the link in Moodle they will go directly to the Google item and can participate as needed.