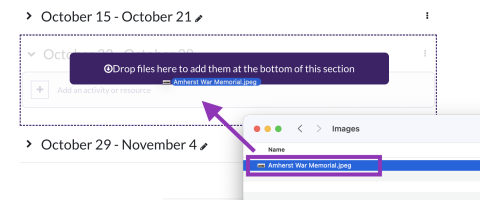
Option 1: Add with drag-and-drop uploading
One way to add an image to the main moodle page for your course is to use drag and drop uploading (when Editing is turned on). However, if you use this method, make sure the image is properly sized beforehand! A safe size is 500 pixels wide or smaller.
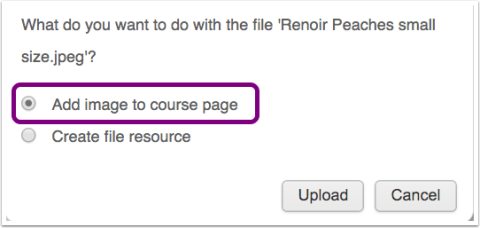
Upon dragging and dropping the image, Moodle will ask if you want to add the image to the course page or create a file resource. Choose Add image to course page.
This will create a "text and media section" on your page containing the image. As with any Moodle resource, you can move it around using the crosshair icon to the left, and edit or delete it using the menu to the right.
Option 2: Add image using the text editor
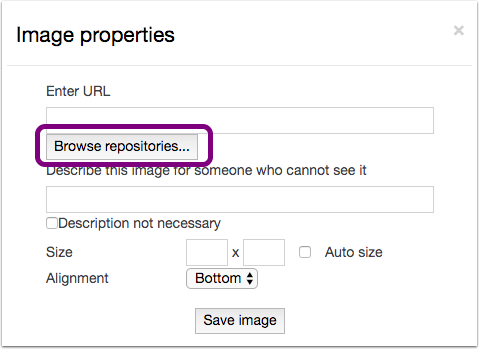
Whenever you add or edit text in Moodle, you can also insert an image. To begin with this method you will need to edit a section header, add a label, or add a page. Once you have a text editor open, you will see icons to insert images or media.

On the next screen you have the option to add an image via URL, or upload one from your computer. To upload an image, click the Browse Repositories button.
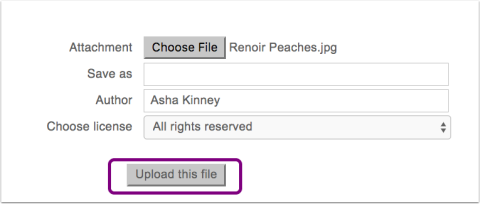
Then, click Upload a file and then choose file.

Find the file on your computer, and back in Moodle click upload this file.
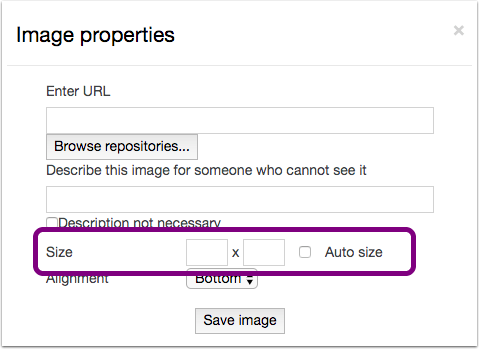
Please be sure to add descriptive text ("alt-text") in the box that says "describe this image".
Depending on the size of the image, you may need to resize it so it will fit on the screen. A safe bet is to check the "Auto size" button which will set the image to match the width of the browser.
After clicking the Save Image button, you will see your image in your text box. To edit it further, click the add/edit image icon again.
Be sure to click Save and Return to Course when you are done!